Article Table Of Contents
- Understanding the Basics of Spray Painting a Car
- Preparing the Car for Paint Job
- Priming Process for a Smooth Finish
- Spray Painting Techniques for a Professional Look
- Applying Varnish for a Glossy Finish
- Dealing With Scratches and Imperfections
- Essential Equipment and Materials for Spray Painting a Car
- Frequently Asked Questions
- Let’s Wrap Up
Have you ever thought about giving your car a fresh, professional-looking paint job yourself? You’re in luck! We’ll guide you step by step through the process of using aerosol cans to achieve that glossy finish.
With a bit of patience, the right techniques, and a touch of craftsmanship, you’ll transform your ride in no time. So, why not embrace the challenge? It’s easier than you’d think, and we’re here to show you how.
Let’s get started, shall we?
Key Takeaways
- Understanding different types of paint and their considerations for colour selection
- Proper preparation of the car’s surface, including removing parts, inspecting for imperfections, and cleaning for a smooth finish
- Importance of surface inspection and masking non-paint areas, considering rust, compatibility, weather, and safety precautions
- Cleaning the surface and area preparations, including washing, removing rust spots, drying, eliminating contaminants, and selecting suitable paint and handling techniques
Understanding the Basics of Spray Painting a Car
Before you can dive into the process of spray painting your car, you’ve got to brush up on the basics. You need to understand various paint types and choose the right one. Acrylic, urethane, or metallic? Each has its perks and quirks, so do your research before buying.
Colour selection is another crucial aspect. You can stick with the original shade or break free and go bold. It’s your car, your choice. Remember, darker colours can hide flaws, but they also show more dirt.
Safety precautions are a must. Wear a mask, gloves and goggles. You don’t want paint particles in your lungs or eyes. Plus, you’re dealing with aerosols, so ensure you’ve got a well-ventilated space.
Spray nozzle choice affects the finish. A wide nozzle gives large, even coverage, but a smaller one offers precision. It’s about finding a balance.
Environmental concerns are vital. Dispose of empty cans responsibly. It’s not just about how your car looks, it’s about respecting our planet too.
Budget considerations are essential. DIY challenges can be fun but remember, good paint isn’t cheap. Cutting corners could cost you more in the long run. So, get informed, get equipped and get painting!
Preparing the Car for Paint Job
Before you start spraying, there’s a bit of work to do to ensure your car’s ready for a new coat of paint.
You’ll need to remove parts that won’t be painted, inspect the surface for any imperfections, and mask off areas you want to protect.
Then, it’s all about cleaning the surface and preparing the area for a smooth, professional finish.
Car Part Removal
You’ll need to start the process by removing certain parts of the car to prepare it for the paint job. The order of removal is vital for efficient time management. Use appropriate disassembling tools and detachment techniques to avoid any damage. These could include:
- Screwdrivers
- Flathead
- Phillips-head
- Pliers
- Needle-nose
- Channel locks
Your panel storage area should be clean and spacious. Keep everything organised to ensure smooth reinstallation. Remember, safety should be your priority. Don’t rush, take your time. With patience and the right approach, you’ll be able to achieve that professional finish you’re aiming for.
Stay tuned for our next section, where we’ll guide you through the actual painting process.
Surface Inspection
After disassembling the necessary parts, it’s crucial for you to thoroughly inspect the car’s surface to prepare for the paint job. Look for signs of rust, as rust detection is paramount before starting. It’s all about liberation from the old to the new.
Paint compatibility is also essential; ensure the aerosol paint is compatible with your car’s existing paint. Weather implications shouldn’t be overlooked; avoid painting in extreme temperatures. Your colour selection can set the mood, choose wisely.
As you spray, the angle matters, maintain a consistent spray angle for an even coat. Also, ensure aerosol can be maintained by shaking it properly before use. And never forget the safety precautions, always wear a mask to protect yourself.
Masking Non-paint Areas
While getting ready for the paint job, it’s important to mask off the areas you don’t want to be painted. This process called detailed masking, involves using various types of masking tape to cover windows, wheels, and other parts. Here’s a quick guide on what you’ll need and how to do it:
Protective Clothing and Ventilation
- Don’t forget your protective clothing. Safety is crucial when handling aerosol paint.
- The importance of good ventilation can’t be overstated. It keeps you safe from harmful fumes.
Masking and Protection
- Use different types of masking tape for varied surfaces. Thicker tapes for rough areas, thinner ones for delicate spots.
- Overspray prevention is key. Always cover windows and wheels to avoid unintentional paint splatters.
Cleaning the Surface
Before you can start spraying, it’s crucial that you thoroughly clean the surface of the car to ensure the paint adheres properly. Surface contaminants like dirt, dust, and rust can interfere with this process. Employ professional cleaning methods to guarantee all grime is eliminated.
Start with a basic wash using a carefully selected detergent that’s safe for your car’s surface. Then, pay extra attention to rust removal, using the appropriate tools and products to get rid of these pesky spots.
Dust prevention is also vital, so make sure to dry the surface thoroughly to prevent dust from settling. Remember, surface dryness is key to getting that perfect, professional finish. The cleaner the surface, the better the result.
Area Preparations
To ensure a professional finish, you’ll need diligence in preparing your car’s area for the paint job. Prioritise safety measures like wearing a respirator and gloves. The workspace should have proper ventilation to avoid inhaling harmful fumes.
Consider these steps:
- Weather conditions – Choose a day with low humidity and no wind. Temperature should be between 50 and 80 degrees Fahrenheit.
- Paint selection – Opt for a high-quality aerosol paint that matches your car’s colour and finish.
- Spray can handling – Shake the can for a minute before spraying and maintain a distance of 10 inches from the car’s surface.
- Disposal practices – Dispose of empty cans responsibly.
- Post-painting care – Apply a clear coat after the paint dries for added protection.
With patience and attention to detail, you’ll achieve a flawless finish.
Priming Process for a Smooth Finish
Now, let’s move on to the pivotal step of priming for a flawless finish.
From selecting the right primer to the technique of applying it, and from layering and drying to post-primer sanding, each step carries its own significance.
Mastering these will ensure your car’s paint job has that professional touch.
Choosing Suitable Primer
To achieve a smooth finish, you’ve got to pick the right car primer, a critical step in the spray painting process. Let’s delve into the factors you need to consider:
Primer Types: There are three major types: epoxy, self-etching, and high-build. Your choice depends on the condition of your car’s surface.
- Epoxy is perfect for bare metal.
- Self-etching works best for light rust.
- For rough surfaces, high-build is the way to go.
Colour Compatibility and Primer Longevity: Ensure your primer colour matches your car’s base coat. Long-lasting primers are cost-effective and ideal for weather considerations.
Eco-Friendly Options: Consider water-based primers, they’re kinder to the environment.
DIY Challenges: It’s not as easy as it seems. Ensure you’re confident with your painting skills before embarking on this.
Primer Application Technique
After selecting the right primer, it’s time for the second step, where you’ll apply three to four coats for a smooth finish. Remember, primer types vary, so use one that’s compatible with your car’s surface. Consider weather conditions too – dry, mild weather is ideal. Always take safety precautions: wear a mask and gloves.
Primer storage is essential; keep aerosol cans in a cool, dry place. Be sure to handle aerosols carefully, shake well before use, and maintain a steady hand while spraying.
Primer disposal is another crucial aspect; dispose of cans responsibly to minimise environmental impact. By following these guidelines, you’ll achieve a professional finish and also contribute to a greener planet.
Layering and Drying Primer
Often, you’ll find that correctly layering and drying your primer is crucial for achieving that desired smooth finish. The type of primer you use, how long it dries, and the weather can all play a part in the result.
Primer types:
- Epoxy primers are great for adhesion and durability.
- High-build primers help fill in imperfections.
Drying duration and Weather impact:
- Allow each coat to dry fully, which can take a few hours or more, depending on the weather conditions.
Sanding Imperfections Post-Primer
You’ll need to diligently sand any imperfections post-primer to ensure you achieve a smooth, professional finish on your car. Primer selection is crucial; opt for a high-build primer to fill minor scratches. Now, onto imperfection detection. Use a bright light and feel the surface for any inconsistencies.
Next, use the correct sandpaper grades. Start with coarse grit sandpaper, like 180 grit, to remove imperfections, then shift to finer grits, like 320 grit, for surface smoothing. Your sanding techniques should involve long, even strokes to avoid creating more imperfections.
After sanding, the post-primer cleaning is essential. Use a tack cloth to remove dust. If imperfections are still visible, don’t worry. Do a primer reapplication and repeat the process until you’re satisfied. Your persistence will pay off.
Spray Painting Techniques for a Professional Look
Let’s move on to the heart of the matter – the spray painting techniques that’ll give your car that professional finish.
You’ll learn how to layer paint effectively, achieve that glossy finish, and sidestep common mistakes.
It’s all about attention to detail, application know-how, and using the right products.
Layering Paint Effectively
Mastering the art of layering paint can significantly enhance the professional look of your spray-painted car. It’s not just about colour selection, but also paint durability, weather considerations, spray patterns, aerosol can maintenance, safety measures, and environmental implications.
Here are some key points to consider:
Colour selection and Paint durability
- Choose a colour that suits your style but also has good wear and tear resistance.
- Consider using a primer for better adhesion and longevity.
Weather considerations and Spray patterns
- Avoid painting in extreme weather conditions as it affects the paint’s drying process.
- Employ different spray patterns for a smooth, even finish.
Aerosol can maintenance and Safety measures
- Keep your aerosol cans clean and shake regularly for optimal pressure.
- Always wear protective gear to ensure safety.
Environmental implications
- Opt for eco-friendly paint options when available.
Achieving Glossy Finish
You’ll need to understand and apply certain spray painting techniques to achieve that coveted glossy finish.
Understanding the gloss scale is fundamental. The higher the gloss, the shinier the finish. Your aerosol can selection makes a difference too. High-quality cans offer a finer mist for a smoother application.
Spray angle is crucial. Aim for a 90-degree angle for an even coating. Be mindful of temperature effects and humidity considerations. Warmer, less humid conditions are ideal for preventing drips and ensuring a smooth finish.
After painting, glossy finish maintenance is essential. Regular washing and waxing help maintain the shine. Post-painting care also includes avoiding abrasive cleaners that can dull the finish.
With these techniques, you’ll always achieve a professional, glossy finish.
Avoiding Common Mistakes
Avoiding common mistakes whilst spray painting your car can significantly improve the overall finish and give it a professional look. You can avoid pitfalls and achieve a high-quality finish by focusing on key areas such as drip prevention, colour selection, aerosol handling, and safety measures.
Here’s a quick guide to help you avoid common errors:
Drip Prevention and Aerosol Handling:
- Shake the can well before use to ensure the paint is mixed thoroughly.
- Hold the can 10 to 12 inches away from the surface to avoid drips.
Colour Selection and Paint Durability:
- Choose a colour that matches your car’s original colour for a seamless finish.
- Opt for a durable paint to withstand weather conditions and general wear and tear.
Applying Varnish for a Glossy Finish
After you’ve applied your final coat of paint, you’ll need a few tins of lacquer to give your car that glossy, professional finish. The durability of lacquer is nothing short of amazing, able to withstand the elements whilst maintaining its shine. Your aerosol selection is critical here; opt for a high-quality, automotive-grade lacquer aerosol.
Before your lacquer application, ensure you have the tools required: a clean, soft cloth and your chosen lacquer. The application process is straightforward but requires precision. Start from the top of your car, spraying in even strokes. Maintain a distance of about 10 inches from the surface to prevent drips.
Safety precautions are crucial. Always work in a well-ventilated area and wear a mask to protect yourself from harmful fumes. After application, respect the drying time. The lacquer can take up to 48 hours to fully dry, so be patient.
Regular maintenance will help preserve that glossy finish. Avoid harsh cleaning products, opting instead for mild soap and water. Use a soft cloth to gently clean the surface.
With these tips, you’re well on your way to achieving your desired professional, glossy finish.
Dealing With Scratches and Imperfections
Before you dive into the actual painting, you’ll need to address the inevitable scratches and imperfections that mar your car’s surface. Don’t worry, dealing with these issues doesn’t have to be daunting. With the right knowledge and products, you can achieve a smooth finish that looks professional.
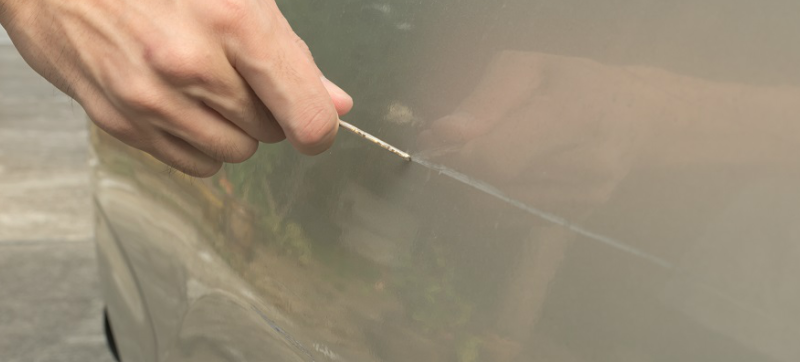
Start by identifying scratches and measuring imperfections. This damage assessment is crucial for determining the right repair techniques. For light scratches, scratch removal products will suffice. For deeper ones, you’ll need to apply a scratch filler.
Here’s a handy guide on how to minimise these imperfections:
Scratch Identification and Removal
- Identify the depth of the scratch
- Use a scratch removal product for surface scratches
- For deeper scratches, apply a scratch filler
Imperfection Measurement and Minimising Techniques
- Measure the size of the imperfection
- Use a sandpaper of appropriate grit size to minimise it
Always do a post-repair inspection to ensure that the surface is ready for painting. This step ensures you’ve achieved the best surface for your new paint job. Remember, prep work is key to achieving a professional finish that’ll make your car look brand new.
Essential Equipment and Materials for Spray Painting a Car
Whilst you’re ready to take on the task, it’s crucial that you’ve got the right equipment and materials to spray paint your car for a professional finish. Safety precautions are key- you’ll need protective eye gear, gloves, and a respirator mask to shield yourself from harmful fumes and paint particles. Ventilation requirements are also important, so ensure your workspace is well-ventilated.
The ideal temperatures for spray painting your car range between 70-80°F. Using the correct aerosols is crucial, and your paint selection should cater to your car’s original colour and finish.
| Required Equipment | Reason | Example |
|---|---|---|
| Safety Gear | To protect from harmful fumes and particles | Respirator Mask |
| Correct Aerosols & Paint | To match car’s original colour and finish | High quality automotive paint |
| Ventilated Workspace | To ensure safe and effective application | Garage with open doors/windows |
Disposal methods are essential to consider. Dispose of used aerosol cans safely – check local recycling guidelines. Lastly, rust treatment is vital before painting. Use a rust converter to treat any rusted areas. With the right equipment and materials, you’re set to give your car that professional finish.
Frequently Asked Questions
What Is the Average Cost to Spray Paint a Car Using Aerosol Cans?
On average, you’ll spend around £100-£200, factoring in paint quality, aerosol brands, your DIY technique, safety measures, paint coverage, spray patterns, and surface preparation. Remember, costs can vary based on these factors.
How long does the paint job using aerosol cans last compared to professional garage painting?
You’ll find paint durability varies. Aerosol quality, surface preparation, primer usage, and the curing process greatly influence longevity. It can last close to professional garage painting with meticulous maintenance and protective measures.
Is There Any Specific Weather Condition Preferable for Spray Painting a Car?
Yes, there’s a sweet spot for weather when you’re spray painting your car. You’ll want a calm, dry day with temperatures between 50-80°F. High humidity or extreme temperatures can affect your paint’s curing process.
Can I Use Aerosol Cans to Spray Paint Car Interiors as Well?
Yes, you can use aerosol cans for car interiors. Prepping surfaces, removing upholstery, and checking material compatibility are key. Your spray technique, drying times, interior protection, and odour management will ensure a professional finish.
Are There Any Environmental Concerns Associated With Using Aerosol Cans for a Car Paint Job?
Yes, there are environmental concerns. Aerosol cans can pose health hazards and contribute to ozone depletion. It’s crucial to recycle properly and explore sustainable alternatives. Always comply with regulations and consider the impact of the study.
Let’s Wrap Up
So, there you have it – the key to unlocking a shining masterpiece on wheels. You’ve transformed a dull shell into a vibrant vision of speed and style with patience, the right tools, and a dash of elbow grease.
Once an everyday vehicle, your car is now a canvas showcasing your spray painting prowess. Be proud and drive with delight, knowing that you’ve given your car a professional finish with your own two hands.


